We have developed a successful project in past year. Now due to some reasons, we need to change hosting and update few endpoints. One major change was to move files from S3 bucket to another location. S3 Bucket has more than 14 GB of files stored. Our challenge was to download the contents of a large S3 folder. That is a tedious task via browser as we need to
- log into the AWS console
- find the bucket
- find the folder
- open the first file
- click download
- open the next file and download again.
- Repeat this process over and over.
But luckily we have AWS CLI. With help AWS CLI, entire process is very easy. I have outline steps about how i have downloaded entire S3 bucket.
Step 1. Install AWS CLI
First thing first. We have to install AWS CLI. AWS Provide 3 OS support as of now with AWS CLI Version 2.
- macOS ( click here for documentation )
- Linux ( click here for documentation )
- Windows ( click here for documentation )Install AWS CLI and verify version.
Step 2. Set up your access keys
This is most important part. When we will try to configure AWS CLI then AWS CLI prompts you for four pieces of information (access key, secret access key, AWS Region, and output format). The AWS Access Key ID and AWS Secret Access Key are your AWS credentials. They are associated with an AWS Identity and Access Management (IAM) user or role that determines what permissions you have. Access keys consist of an access key ID and secret access key, which are used to sign programmatic requests that you make to AWS.
To create access keys for an IAM user
- Sign in to the AWS Management Console and open the IAM console at https://console.aws.amazon.
com/iam/ - In the navigation pane, choose Users.
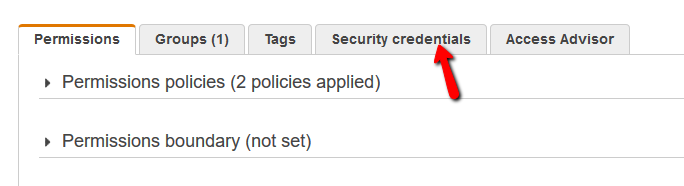
- Choose the name of the user whose access keys you want to create, and then choose the Security credentials tab.
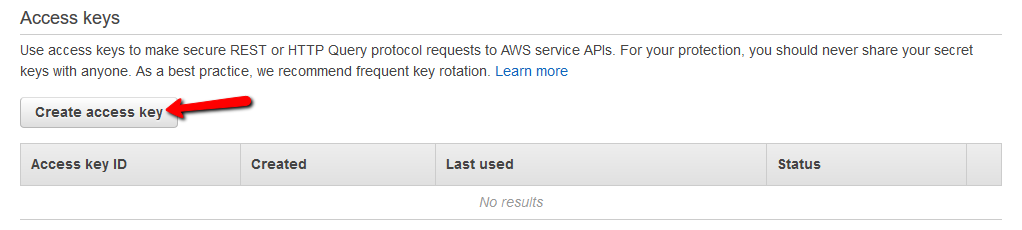
- In the Access keys section, choose Create access key.
- To view the new access key pair, choose Show. You will not have access to the secret access key again after this dialog box closes. Your credentials will look something like this:
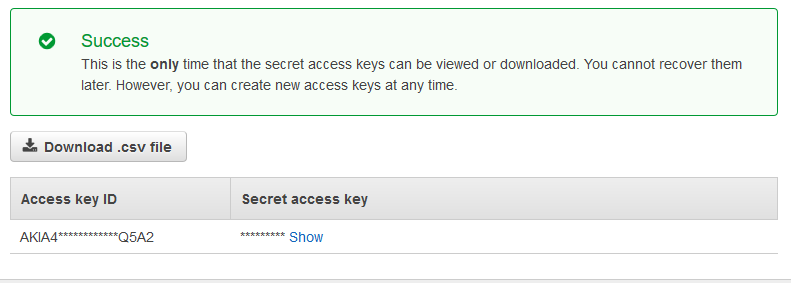
- To download the key pair, choose Download .csv file. Store the keys in a secure location. You will not have access to the secret access key again after this dialog box closes.
- After you download the .csv file, choose Close. When you create an access key, the key pair is active by default, and you can use the pair right away.
Step 3. Configure AWS CLI
Run aws2 configure command. This command is the fastest way to set up your AWS CLI installation.
When you first time run this command you will find [None] in bracket. That means, you have yet not configured it. If you have already configured it then prompt will display value like [***************WXYZ]. You can change those values by updating new values or keep them as is.
$ aws2 configure
AWS Access Key ID [None]: <enter the access key you have created as per step 2>
AWS Secret Access Key [None]: <enter the secret access key you have created as per step 2>
Default region name [None]: <enter region - i have provided below>
Default output format [None]: <format - i have provided below >
Valid Region Names
| Name | Code |
|---|---|
| US East (Ohio) | us-east-2 |
| US East (N. Virginia) | us-east-1 |
| US West (N. California) | us-west-1 |
| US West (Oregon) | us-west-2 |
| Asia Pacific (Hong Kong) | ap-east-1 |
| Asia Pacific (Mumbai) | ap-south-1 |
| Asia Pacific (Osaka-Local) | ap-northeast-3 |
| Asia Pacific (Seoul) | ap-northeast-2 |
| Asia Pacific (Singapore) | ap-southeast-1 |
| Asia Pacific (Sydney) | ap-southeast-2 |
| Asia Pacific (Tokyo) | ap-northeast-1 |
| Canada (Central) | ca-central-1 |
| Europe (Frankfurt) | eu-central-1 |
| Europe (Ireland) | eu-west-1 |
| Europe (London) | eu-west-2 |
| Europe (Paris) | eu-west-3 |
| Europe (Stockholm) | eu-north-1 |
| Middle East (Bahrain) | me-south-1 |
| South America (São Paulo) | sa-east-1 |
Use this link for future updates on more regions
Valid output format are
- json
- table
- text
You can find more information on format at here.
Step 4. Find your bucket name
Before we download bucket files, we need to fetch S3 bucket name. Just click on bucket and it will open popup like following.
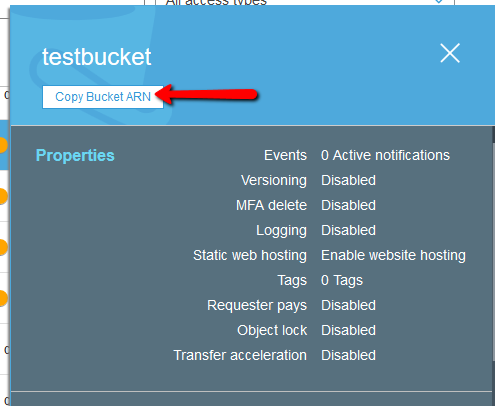
Click on copy ARN. Here last section is your bucket name.
Step 5. Download Bucket
$ aws2 s3 sync s3://<bucket>/<path> </local/path>